why make this recipe
Upside Down Pear Tarts are a delightful treat that brings a sweet and tangy flavor in every bite. This recipe is perfect for anyone who loves the taste of fresh pears combined with buttery pastry. It’s simple to make, and it’s sure to impress your family and friends. Not only does it look beautiful, but it also offers an amazing taste that will leave everyone wanting more.
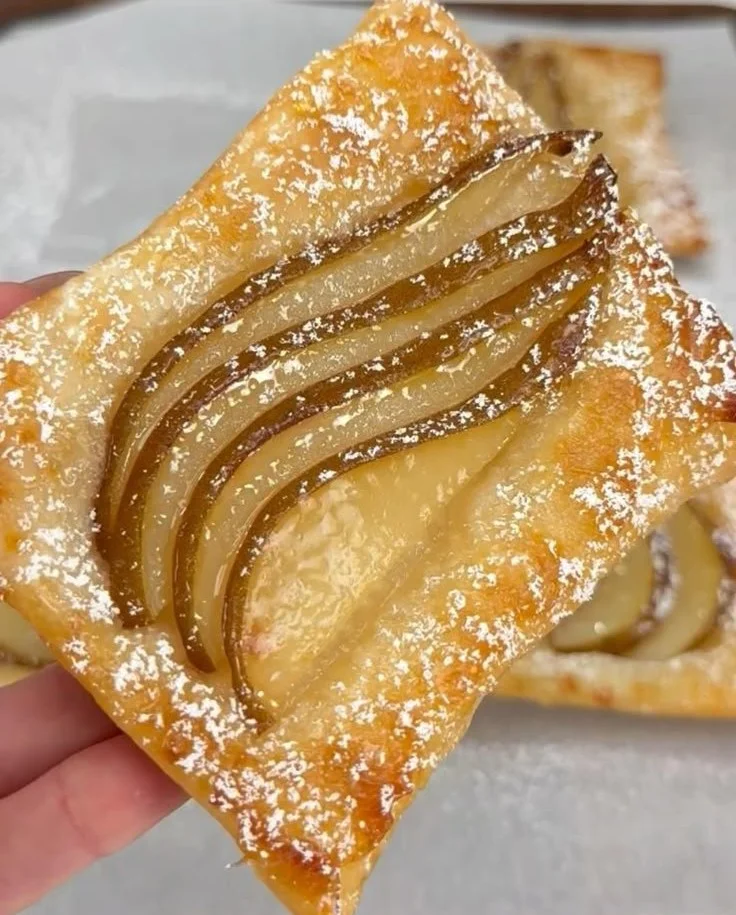
how to make Upside Down Pear Tarts
Ingredients :
- Puff pastry
- Pears
- Brown sugar
- Butter
Directions :
- Preheat the oven to 375°F (190°C).
- Slice the pears and sauté them in butter and brown sugar until softened.
- Roll out the puff pastry and cut into rounds.
- Arrange the sautéed pears on the puff pastry rounds and cover with another layer of pastry if desired.
- Bake in the preheated oven for 15 minutes or until the pastry is golden brown.
- Let cool slightly before serving.
how to serve Upside Down Pear Tarts
Serve the Upside Down Pear Tarts warm with a scoop of vanilla ice cream or a dollop of whipped cream on top. The combination of the warm tart and cold ice cream is simply heavenly. You can also sprinkle some cinnamon or powdered sugar over the top for an extra touch.

how to store Upside Down Pear Tarts
To store these tarts, place them in an airtight container and keep them in the refrigerator. They are best enjoyed within a few days of baking. To reheat, simply pop them in the oven for a few minutes to restore their crispiness.
tips to make Upside Down Pear Tarts
- Choose ripe but firm pears for the best texture.
- You can add spices like cinnamon or nutmeg to the brown sugar for extra flavor.
- If you don’t have puff pastry, you can use pie crust as a substitute.
- Experiment with different types of fruits, like apples or peaches, for a variety of tarts.
variation
For a twist on this recipe, try adding some nuts like walnuts or pecans to the sautéed pears. This will add a crunchy texture and nutty flavor that pairs well with the sweetness of the fruit. You can also substitute some of the brown sugar with maple syrup for a different sweetness profile.
FAQs
Can I use canned pears instead of fresh?
Yes, you can use canned pears. Just make sure to drain them well and pat them dry before cooking.
How long does it take to make these tarts?
The whole process takes about 30 minutes, including preparation and baking time.
Can I freeze Upside Down Pear Tarts?
Yes, you can freeze them before baking. Just wrap them tightly in plastic wrap and place them in a freezer-safe container. When ready to bake, just add a few extra minutes to the baking time.

Upside Down Pear Tarts
Ingredients
Method
- Preheat the oven to 375°F (190°C).
- Slice the pears and sauté them in butter and brown sugar until softened.
- Roll out the puff pastry and cut into rounds.
- Arrange the sautéed pears on the puff pastry rounds and cover with another layer of pastry if desired.
- Bake in the preheated oven for 15 minutes or until the pastry is golden brown.
- Let cool slightly before serving.
- Serve the Upside Down Pear Tarts warm with a scoop of vanilla ice cream or a dollop of whipped cream on top.
- Sprinkle some cinnamon or powdered sugar over the top for an extra touch.
Notes

Name: Yumi HwagByline: Founder & Recipe Developer, YumimealsBio : Yumi tests weeknight-friendly air fryer, slow cooker, and BBQ recipes in a small home kitchen. She focuses on simple steps, real-family testing, and clear food-safety guidance. Contact: [email protected]