chocolate layer cake recipe nights usually start the same way for me: I want something homemade and cozy, but I do not want a complicated project that trashes my kitchen. Maybe you have got a birthday coming up, or maybe you just need a slice of something chocolatey after a long week. Either way, this is the kind of cake that feels special without being fussy. It bakes up soft, stacks nicely, and tastes like the chocolate cake people always hope you brought. And yes, it is totally doable even if you are not a confident baker yet.
Key Ingredients for a Chocolate Layer Cake
Let us talk ingredients, because this is where the magic starts. I am not into cake recipes that require a bunch of rare items you will use once and forget in the back of the pantry. This one sticks to basics, but each ingredient has a job. When you understand why it is there, you can bake with way more confidence.
My must haves and why they matter
- All purpose flour: Gives the cake structure so it slices cleanly but still feels soft.
- Unsweetened cocoa powder: This is the main chocolate flavor. Use a good one you like the smell of.
- Sugar: Sweetens and helps keep the crumb tender. Do not cut it too much or the cake can turn dry.
- Baking powder and baking soda: Helps the layers rise and stay fluffy.
- Salt: Makes the chocolate taste bigger and richer. Small amount, big impact.
- Eggs: Hold everything together and add richness.
- Oil or melted butter: Oil makes it extra moist. Butter adds a little more flavor. I usually pick oil when I want guaranteed softness.
- Buttermilk or milk with a splash of vinegar: Adds tenderness and balances the sweetness.
- Hot coffee or hot water: Coffee makes it taste more chocolatey without making it taste like coffee. Hot water works too.
- Vanilla extract: The background flavor that makes the whole cake taste like a bakery treat.
For frosting, you can go classic with chocolate buttercream, or do a simple ganache if you want that glossy, dramatic look. Either way, use real butter and a cocoa you enjoy. If you have ever tasted a frosting that felt flat, it is often the cocoa or the salt being off.
One more thing: room temperature eggs and milk mix in more smoothly. I used to ignore that advice until I noticed how much nicer the batter looks when everything blends without fighting you.

Secrets to Making the Best Chocolate Layer Cake
This is the part where I share the little things I learned after baking this kind of cake for family birthdays, random Sunday dinners, and that one time I promised dessert and completely forgot until late afternoon. The good news is the “secrets” are not fancy. They are just simple habits that make your layers bake evenly and taste amazing.
Reason 1 you will love it: It is forgiving. You do not need perfect skills to get a great result, as long as you follow a few basics.
Here are my go to tips:
1. Measure in a calm way. I do not mean you need a scale, although it is nice. Just spoon flour into the measuring cup and level it off. If you scoop straight from the bag, it packs in and your cake can come out heavy.
2. Do not overmix. Once flour goes in, stir until it is just combined. Overmixing can make the cake a little tough, and we want soft layers that feel like a treat.
3. Line your pans. I always use parchment circles on the bottom. It makes the cake release cleanly, and it saves your mood. A stuck cake layer is such a heartbreak.
4. Bake evenly. If your oven runs hot, the edges can dry out before the center is done. I rotate the pans halfway through baking. Also, try to use the same type of pan for both layers so they bake at the same pace.
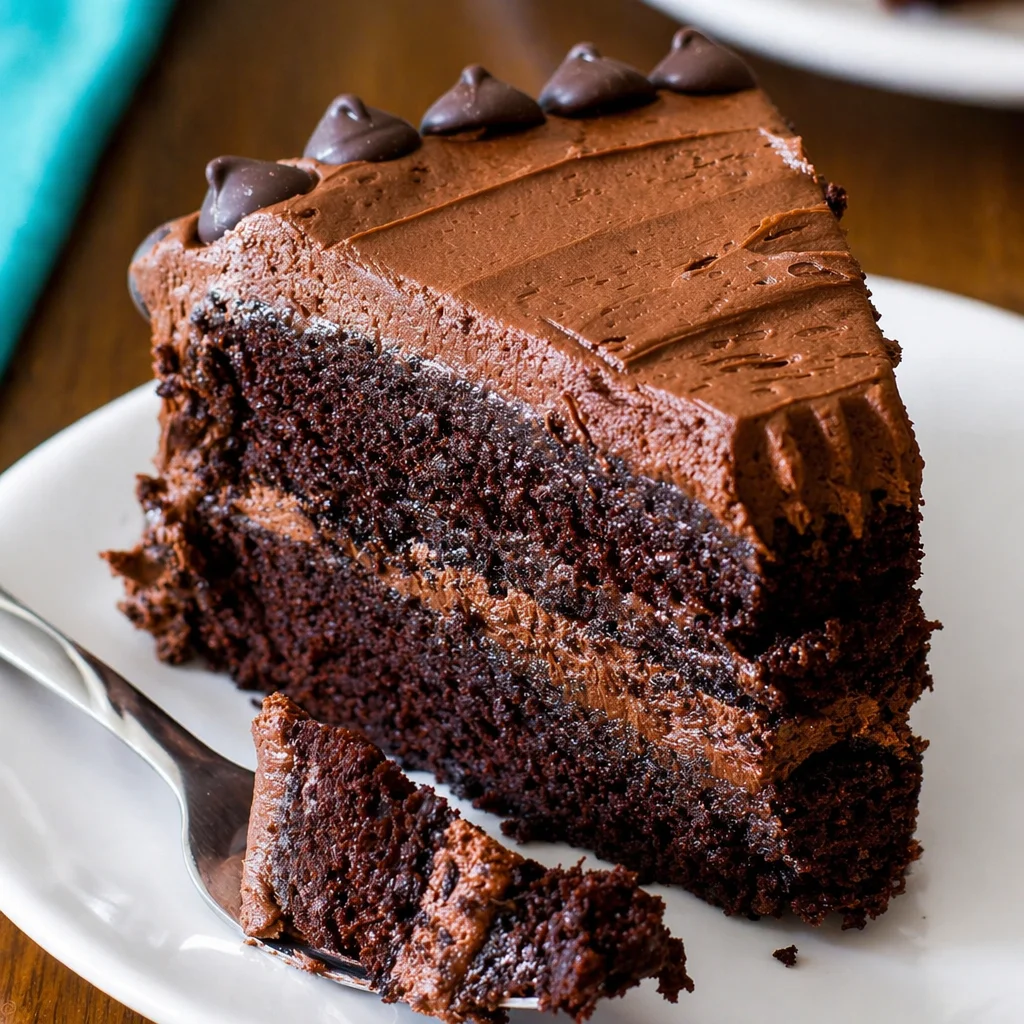
5. Cool completely before frosting. I know, waiting is annoying. But warm cake plus frosting equals slipping layers and messy sides. Let them cool, then chill the layers for 20 minutes if you want an easier time stacking.
Reason 2 you will love it: The texture stays moist for days. That means you can bake it for an event and not panic that it will dry out by the time guests arrive.
And here is my little flavor trick: add hot coffee to the batter. It does not make the cake taste like a latte. It just deepens the cocoa flavor in a way that tastes like you tried harder than you did. That is the best kind of win.
Make-Ahead Chocolate Cake Tips
Real life is busy, and that is why I really appreciate a cake that can be made in pieces. This is Reason 3 you will love it: you can spread the work out and still end up with a stunning dessert. If you have got guests coming, this is the section you will want to save.
Here is how I do it:
Bake the layers ahead. Once they are fully cool, wrap each layer tightly in plastic wrap. Then add a second layer of protection with foil. Keep them at room temperature for about a day, or freeze for longer.
Freezing is your friend. Freeze the layers up to a month. When you are ready, thaw them in the fridge overnight. Slightly cold layers are easier to frost because they crumble less.
Make the frosting ahead too. Buttercream can be made a couple days ahead and stored in the fridge. Bring it to room temperature and rewhip it for a minute so it gets fluffy again. If it looks split at first, keep mixing. It usually comes back together.
Do a quick syrup if needed. If you are baking in advance and worry about moisture, brush layers lightly with simple syrup. I keep it basic: equal parts sugar and water, heated until dissolved, cooled. You can add a tiny splash of vanilla.
Reason 4 you will love it: It is party friendly. You can assemble it the day of and it still tastes like you baked it that morning.
Decorating Tips for Layered Cakes
I am not a fancy cake decorator. I love a cake that looks homemade in a charming way, not like it needs a spotlight and a rotating stand. If you have ever worried that your cake has to look perfect, I am here to say it does not. A delicious chocolate cake with a few simple finishing touches wins every time.
My easiest decorating tips:
Start with a crumb coat. This is a thin layer of frosting that traps loose crumbs. Chill the cake for 15 to 20 minutes, then add your final frosting layer. It makes everything smoother with way less stress.
Use an offset spatula or a butter knife. You can swirl the frosting on purpose and call it “rustic.” Nobody complains about swirls.
Make layers even. If the cake domes in the middle, trim the top with a serrated knife once it is cool. Save the scraps for snacking, obviously.
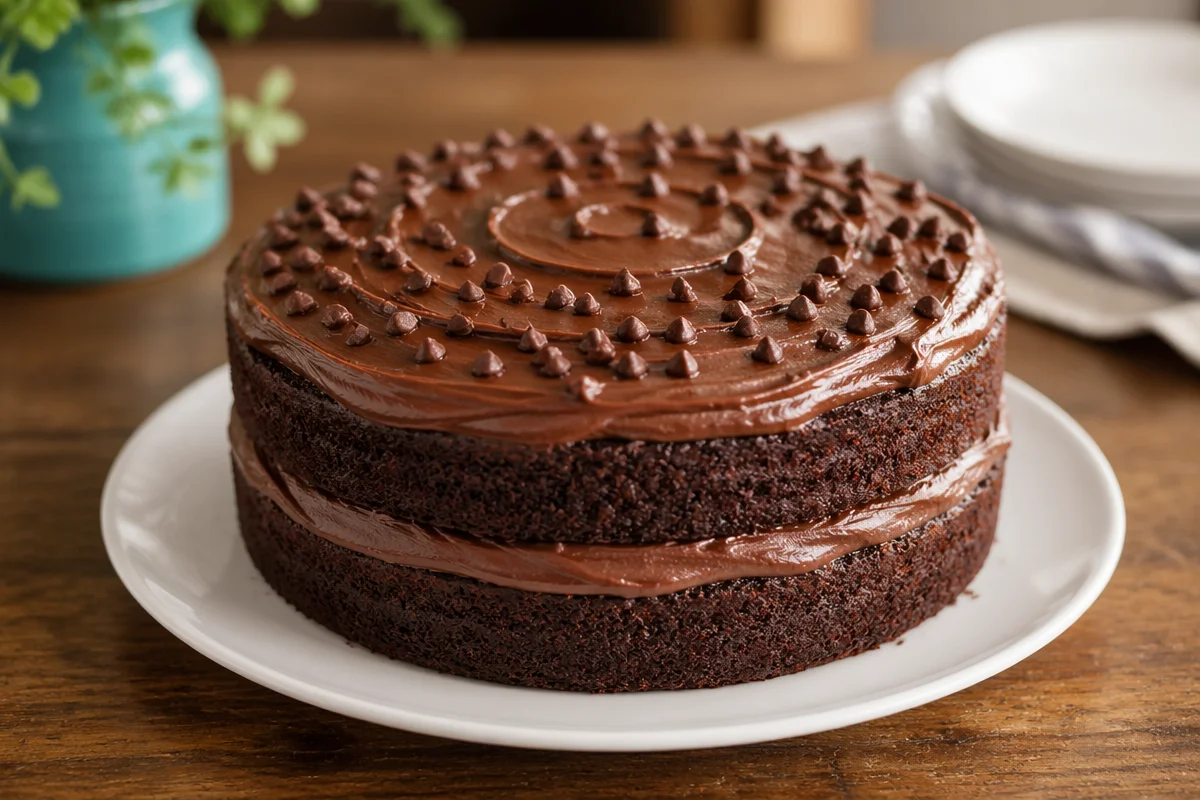
Simple toppings that always work: a sprinkle of chocolate shavings, a dusting of cocoa, crushed cookies, or fresh berries. My favorite is a handful of curls from a chocolate bar because it looks fancy with almost zero effort.
If you are transporting the cake, chill it for 30 minutes first. Cold frosting is sturdier. I have learned this after one too many car rides where I held my breath at every stoplight.
Recipe Variations for Chocolate Layer Cake
This is Reason 5 you will love it: you can tweak the vibe without learning a whole new method. Once you have a solid chocolate layer cake recipe, it becomes your base for all kinds of occasions. And you will not get bored because there are so many easy ways to switch it up.
Easy flavor swaps
Mint chocolate: Add a tiny splash of peppermint extract to the frosting. Go light because it can take over fast.
Peanut butter frosting: Swap some of the buttercream for peanut butter. That salty sweet combo is unreal.
Raspberry filling: Spread a thin layer of raspberry jam between the cake layers before frosting. It cuts the richness in the best way.
Mocha: Add espresso powder to the batter and a pinch to the frosting too. Chocolate plus coffee is always a yes.
Chocolate orange: Add orange zest to the batter or frosting. It makes the whole thing taste brighter.
If you need a quicker option, bake it as a sheet cake instead of layers. Same flavor, less assembly. But when you want that wow factor, layers are worth it.
Also, if you are baking for someone with dietary needs, you can often swap in a 1 to 1 gluten free flour blend. I recommend doing a small test run first, but I have had good results with blends that include xanthan gum.
Common Questions
Q: Can I use natural cocoa powder or Dutch processed cocoa?
A: Either can work, but pay attention to the recipe’s leavening. If the recipe uses baking soda, natural cocoa usually plays nicer. If you only have Dutch processed, it still often turns out fine for home baking, just do not change other ingredients.
Q: Why did my layers sink in the middle?
A: Most of the time it is underbaking, overmixing, or opening the oven too early. Try baking a few extra minutes and test the center with a toothpick. A few moist crumbs are fine, wet batter is not.
Q: How do I keep the cake from crumbling when I frost it?
A: Chill the layers first and do a crumb coat. Cold cake is sturdier, and the crumb coat locks everything in so your final layer looks clean.
Q: Can I make this into cupcakes?
A: Yes. Fill liners about two thirds full and start checking around 16 to 18 minutes, depending on your oven. Cool completely before frosting.
Q: What is the best way to store leftovers?
A: Keep it covered at room temperature for a day if your kitchen is cool. For longer, store it in the fridge and let slices sit out for 15 minutes before eating so the frosting softens up.
A sweet final note before you start baking
If you have been hunting for a chocolate layer cake recipe that feels reliable, cozy, and totally worth turning the oven on for, I hope you give this one a try. Keep the ingredients simple, let the layers cool, and do not stress the decoration. The best part is sharing a slice with someone and watching their face do that little happy thing after the first bite. When you bake it, make it your own, and do not forget to save a little extra frosting for “taste testing.”
Chocolate Layer Cake
Ingredients
Method
- Preheat your oven to 350°F (175°C) and grease two 9-inch round baking pans.
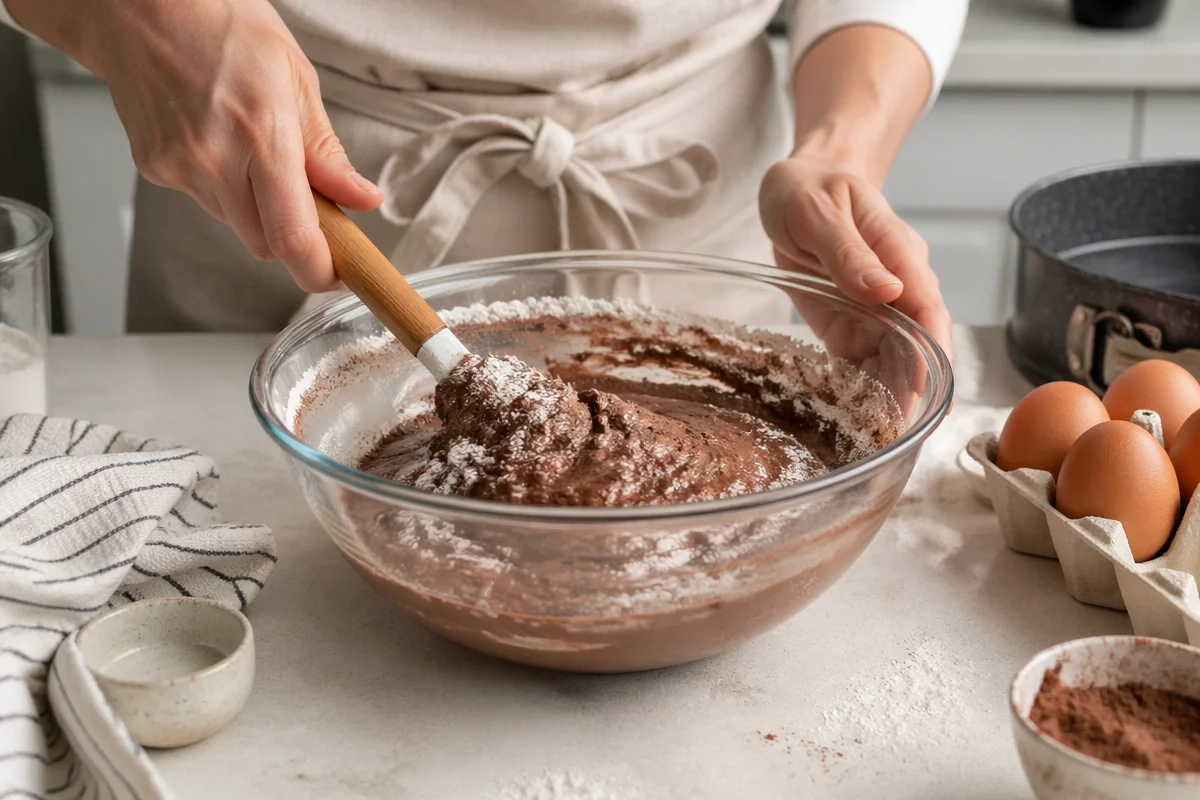
- In a bowl, whisk together the flour, cocoa powder, sugar, baking powder, baking soda, and salt.
- In another bowl, beat the eggs, then add oil (or melted butter), buttermilk, hot coffee, and vanilla extract. Mix well.
- Gradually combine the wet and dry ingredients, mixing until just combined.
- Divide the batter evenly between the prepared pans.
- Bake for 30-35 minutes or until a toothpick inserted into the center comes out clean.
- Once baked, let them cool in the pans for 10 minutes before transferring them to a wire rack to cool completely.
- To make the frosting, beat the butter until creamy, then gradually add powdered sugar and cocoa powder. Add milk to reach desired consistency.
- Once the cake layers are completely cool, place one layer on a serving plate and spread frosting over the top.
- Place the second layer on top and finish frosting the top and sides of the cake.
Notes

Name: Yumi HwagByline: Founder & Recipe Developer, YumimealsBio : Yumi tests weeknight-friendly air fryer, slow cooker, and BBQ recipes in a small home kitchen. She focuses on simple steps, real-family testing, and clear food-safety guidance. Contact: [email protected]