red velvet cake recipe is one of those things I crave the second a birthday invite hits my calendar. You know the feeling, you want something that looks fancy, tastes like a treat, and still feels doable on a regular weekend. I also hear the same complaint all the time: some red velvet cakes look gorgeous but taste flat, or they turn out dry, or the frosting is way too sweet. So today I’m sharing my favorite, very real world ideas that I actually make when I want a guaranteed wow. You’ll get five fun spins, plus the basics so you can pick the one that fits your mood and your schedule.
What Does Red Velvet Cake Taste Like?
Let’s clear this up because people argue about it like it’s a sports team. Red velvet is not just chocolate cake dyed red. It’s also not plain vanilla with food coloring. To me, a good red velvet cake tastes like a gentle cocoa cake with a little tang and a super soft crumb.
Here’s what you should expect when you nail it:
Flavor: light cocoa, vanilla, and a little zip from buttermilk and sometimes vinegar.
Texture: tender and moist, not dense like a brownie, not fluffy like angel cake.
Frosting pairing: most people love cream cheese frosting because the tang makes the cake taste richer.
If you’ve had one that tasted like nothing, it was probably missing enough cocoa, salt, or acid. If you’ve had one that tasted like straight chocolate, it was probably closer to a chocolate layer cake with extra dye. The sweet spot is right in the middle, and that’s what these ideas aim for.
How to Make Red Velvet Cake
I’ll give you my go to method, then the five recipe ideas build off it. And yes, this is the kind of red velvet cake recipe you can make without special tools besides cake pans and a mixer.
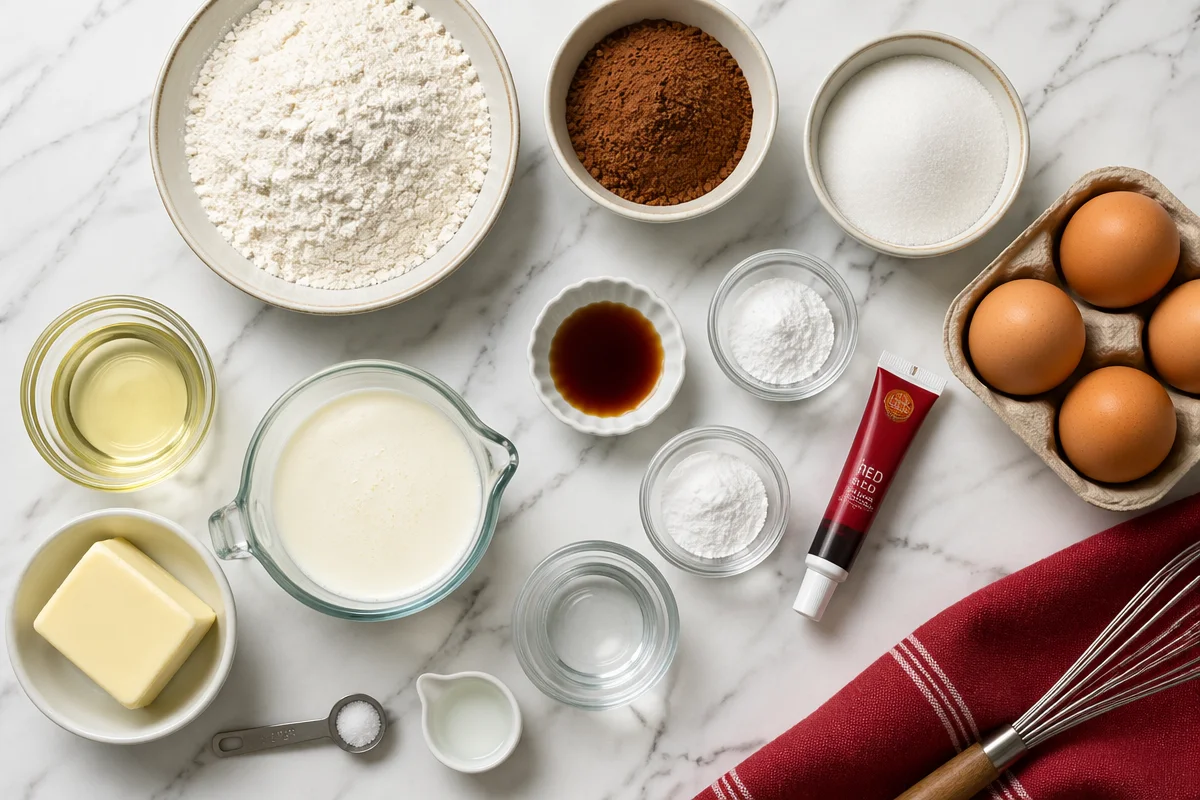
What you will need
- All purpose flour
- Unsweetened cocoa powder (just a little, but it matters)
- Sugar
- Oil or butter (I like oil for moisture, butter for flavor, or a mix)
- Eggs
- Buttermilk (or milk plus a splash of lemon juice in a pinch)
- Vanilla extract
- Baking soda and baking powder (some recipes use only one, I like both for balance)
- A tiny bit of vinegar (it helps the rise and the color)
- Red gel food coloring (gel gives strong color without watering the batter down)
- Salt
Basic flow that works almost every time:
Mix your dry ingredients in one bowl. Mix your wet ingredients in another bowl. Combine gently until you don’t see dry streaks. Don’t beat it forever. Pour into prepared pans and bake until a toothpick comes out clean or with a few soft crumbs. Cool completely before frosting or the frosting will slide around and you’ll be annoyed.
One more thing. If you love baking basics like I do, I usually keep a quick “cake day” checklist on hand. I’d link it here if I could, but your internal link list is empty, so I can’t add the two required internal links without actual URLs to use. Send me your site link list and I’ll place two clickable internal links naturally in the sections.
Also, here’s a little cheat sheet that helps you choose the right version depending on the occasion.
Pro Tips for Making This Recipe
I’ve made enough red velvet to learn a few things the hard way. If you want that bakery style outcome without stress, these tips help a lot.
Measure the cocoa. Too much and it becomes chocolate cake. Too little and it tastes like red vanilla.
Use room temp ingredients when you can. Cold eggs and cold buttermilk can make the batter look a little curdled, and it bakes up less smooth.
Don’t skip the salt. It’s the difference between “sweet” and “wow, what is that flavor?”
Gel food coloring gives you that deep red without thinning your batter. Liquid works, but you may need more.
Cool fully before frosting. I know, waiting is the worst. But warm cake plus cream cheese frosting equals a slippery mess.
For clean slices, chill the frosted cake for 20 to 30 minutes, then wipe your knife between cuts.
If you’re short on time, bake the layers the day before, wrap them well, and frost the next day. Honestly, I think the flavor gets even better after a rest.
Meet Our Four Red Velvet Cake Contenders
Okay, quick confession. Even though this post is “5 Irresistible Red Velvet Cake Recipe Ideas You’ll Love,” I tend to group them into four main contenders, then one wildcard that’s basically the party trick version. The point is to give you options without making you learn five totally different methods.
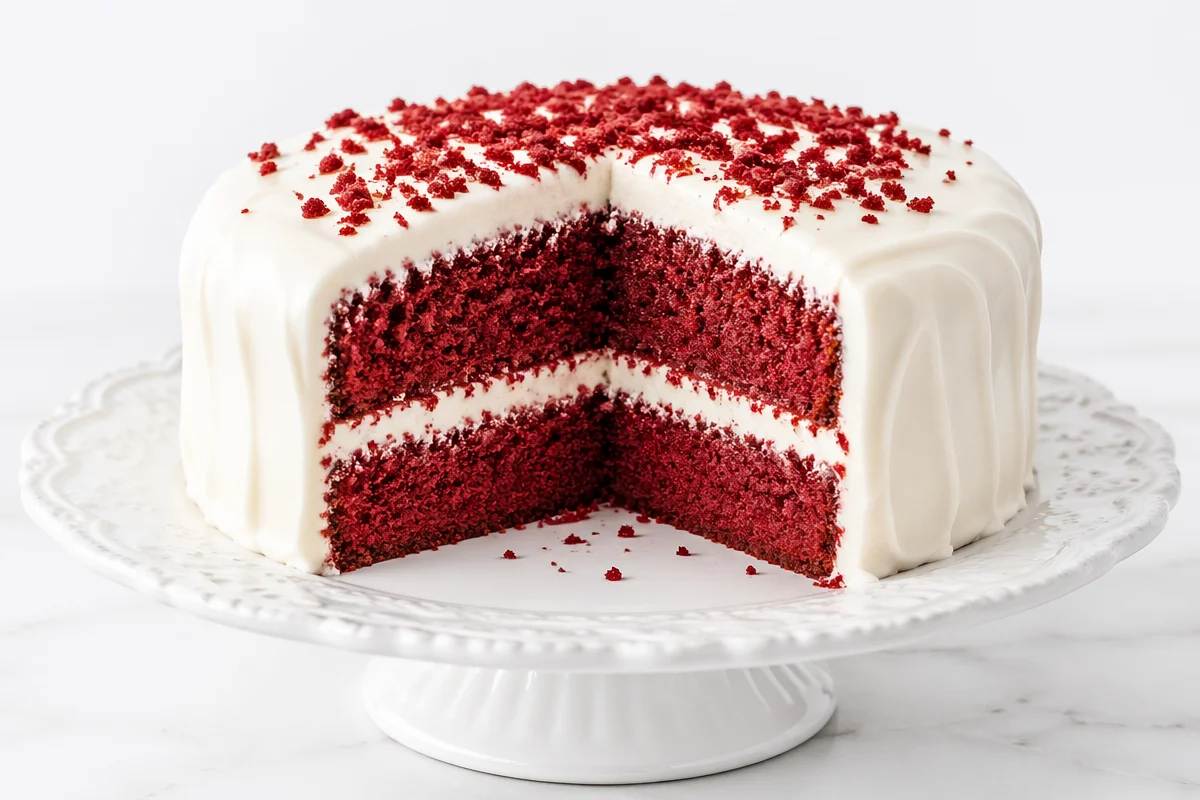
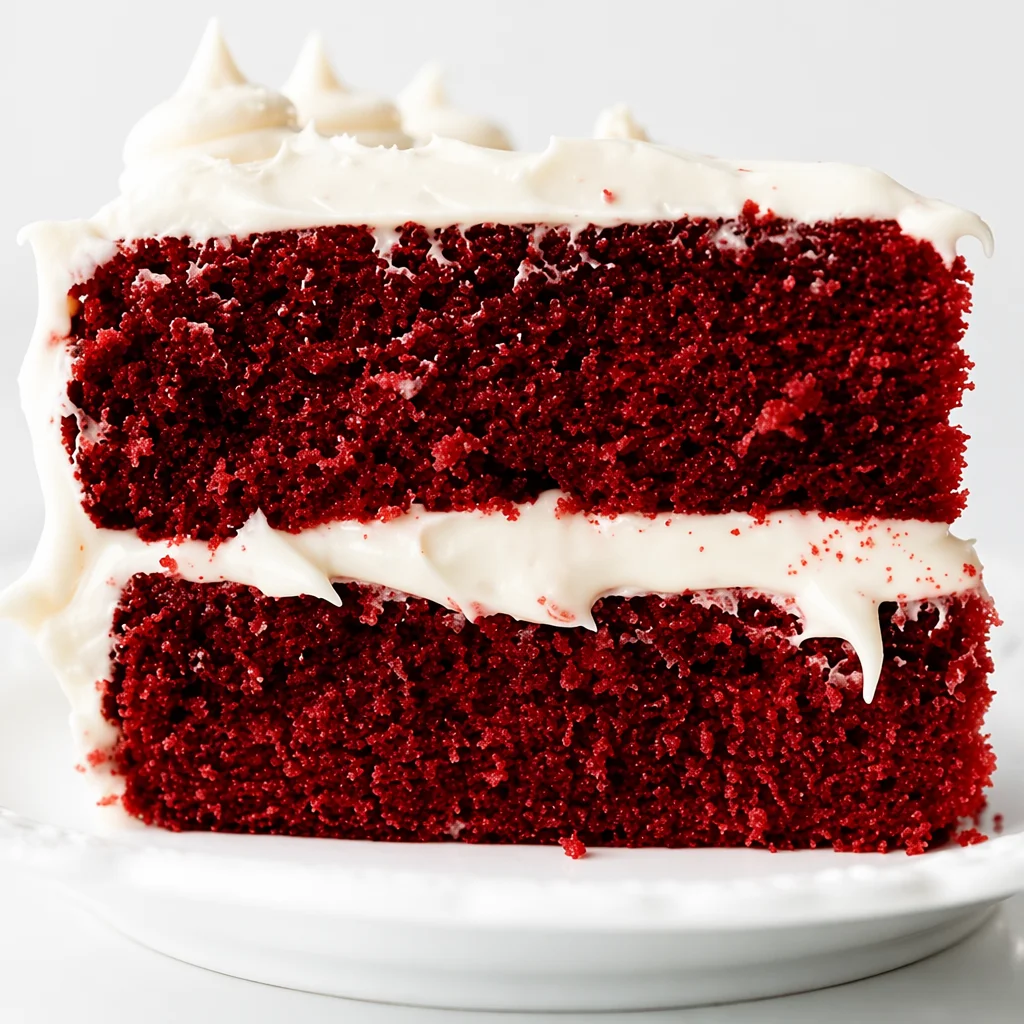
Contender 1: Classic layer cake with cream cheese frosting
This is the one people picture. Two or three layers, thick frosting, and a little cake crumble on top if you’re feeling extra. It’s the best choice for birthdays and holidays. If you’re looking for that nostalgic bakery vibe, stick with this red velvet cake recipe style and keep it simple.
Contender 2: Sheet cake for a crowd
Same flavor, less drama. A sheet cake bakes evenly, slices easily, and feeds everyone without stacking layers. I love this for potlucks because it travels well and you can frost it right in the pan. Add sprinkles or chocolate curls and it looks like you tried really hard, even if you didn’t.
Contender 3: Bundt cake with a drizzle
Bundt cakes feel fancy with basically zero decorating skills required. I like a light cream cheese glaze instead of a thick frosting layer. It’s perfect for brunch, coffee meetups, or when you want a “slice with tea” kind of dessert.
Contender 4: Cupcakes with a surprise center
These are dangerously fun. You bake cupcakes, scoop a little center, and fill with something like raspberry jam or a spoon of cheesecake style filling. Then frost and watch people bite in and do that little happy pause. If you want to make your red velvet cake recipe feel new again, this is a great move.
And now for the fifth idea, the wildcard that I make when I want people to talk about dessert all night.
Wild card idea: Red velvet cake jars. Layer cake pieces with cream cheese frosting in small jars, top with crumbs, and chill. They’re cute, portable, and honestly perfect for gifting. Plus you don’t have to worry about perfect layers.
How I Tested the Cakes
I didn’t test these like a lab scientist, but I did test them like a real home baker who hates wasting ingredients. I baked on two different weekends. I made one classic layer cake, one sheet cake, and one cupcake batch, then used the same base batter to create the other variations.
Here’s what I paid attention to:
Moisture on day two, because red velvet should still taste soft after it sits.
Color after baking, because sometimes it looks bright in the bowl and dull in the oven.
Frosting balance, since cream cheese frosting can get too sweet or too loose if you’re not careful.
Ease, because if it’s annoying, I won’t make it again. That’s just real life.
The biggest win across all tests was not overbaking. Red velvet goes from perfect to dry pretty fast. I start checking a few minutes early, especially with cupcakes and thin layers. Another win: letting the cake cool completely, then chilling the frosted cake before serving. It makes the whole thing taste more set and rich.
Common Questions
Q: Can I make this red velvet cake recipe without buttermilk?
A: Yes. Use milk plus 1 tablespoon lemon juice or vinegar per cup of milk, then let it sit 5 minutes. Real buttermilk tastes better, but this works.
Q: Why add vinegar?
A: It reacts with baking soda and helps with lift and tenderness. You won’t taste it if you use the small amount most recipes call for.
Q: Can I use natural food coloring or beet powder?
A: You can, but the color usually turns more brownish red. The cake can still taste great, just don’t expect that bold classic red.
Q: What’s the best frosting if I don’t like cream cheese?
A: Try a vanilla buttercream with a pinch more salt, or an ermine frosting if you want something lighter. The cake is still delicious.
Q: How do I store it?
A: If it has cream cheese frosting, keep it in the fridge. Let slices sit out 15 minutes before eating so the texture softens.
A Sweet Little Wrap Up
If you’ve been hunting for a red velvet cake recipe that actually tastes like something and not just red colored sugar, I hope these five ideas help you find your favorite version. Pick the classic layer cake for big moments, the sheet cake for easy sharing, the bundt for low effort charm, the cupcakes for fun surprises, or the jar version when you want a cute twist. If you want a trusted classic reference, I’ve always liked Red Velvet Cake with Cream Cheese Frosting – Sally’s Baking for technique and timing. And if you enjoy comparing methods like I do, I Tried Four Popular Red Velvet Cake Recipes and Found the Best … is a fun read before you bake. Now go grab your cocoa and buttermilk, and make the version that sounds so good you can already taste it.
Red Velvet Cake
Ingredients
Method
- Preheat the oven to 350°F (175°C) and prepare cake pans.
- In one bowl, mix all the dry ingredients including flour, cocoa powder, sugar, salt, baking powder, and baking soda.
- In another bowl, mix the wet ingredients: oil or butter, eggs, buttermilk, vanilla extract, vinegar, and red gel food coloring.
- Combine wet and dry ingredients gently until there are no dry streaks, being careful not to overbeat.
- Pour the batter into prepared pans and bake for 25-30 minutes or until a toothpick comes out clean.
- Allow the cakes to cool completely before frosting.
- Frost with cream cheese frosting after the cakes have cooled. For clean slices, chill the cake for 20-30 minutes.
Notes

Name: Yumi HwagByline: Founder & Recipe Developer, YumimealsBio : Yumi tests weeknight-friendly air fryer, slow cooker, and BBQ recipes in a small home kitchen. She focuses on simple steps, real-family testing, and clear food-safety guidance. Contact: [email protected]